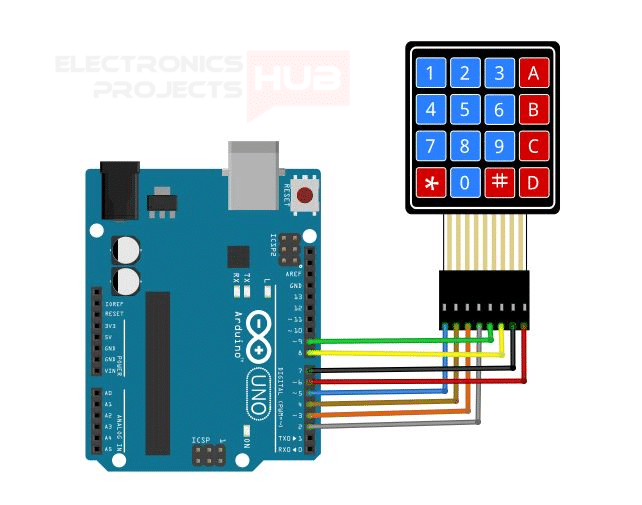
In this tutorial, you will learn how to interface keypad 4×4 with Arduino. Don’t worry its easy, just follow the steps below.
Contents
Before getting started, watch this video first to understand about working and interfacing keypad with arduino.
Arduino Keypad Tutorial
4×4 Keypad Pinout and Connections

Keypad Library for Arduino
Download Keypad Library for Arduino
Keypad Arduino Code
Note : You need to install the above attached keypad library for Arduino.
#include <Keypad.h>

const byte ROWS = 4; //four rows

const byte COLS = 4; //three columns

char keys[ROWS][COLS] = {

  {'1','2','3','A'},

  {'4','5','6','B' },

  {'7','8','9','C'},

  {'*','0','#','D'}

};

byte rowPins[ROWS] = {5, 4, 3, 2}; //connect to the row pinouts of the keypad

byte colPins[COLS] = {9, 8, 7, 6}; //connect to the column pinouts of the keypad

Keypad keypad = Keypad( makeKeymap(keys), rowPins, colPins, ROWS, COLS );

void setup(){
  Serial.begin(9600);
}

void loop(){
  char key = keypad.getKey();
  if (key != NO_KEY){
    Serial.println(key);
  }
}
If you have any queries feel free to connect us on social handles Facebook