Interfacing MQ-135 Gas Sensor with Arduino
Contents
In this article, you will see how to interface MQ-135 sensor to Arduino and read Co2 levels in the atmosphere. According to need, you can display the CO2 levels on Serial Monitor or LCD. I made this article simple and easy to understand so that beginners can also understand. Before getting started you must know about MQ-135. MQ-135 is a gas sensor which is sensitive to CO2. The change in CO2 levels changes the resistance of sensor which results in the change in the output of the sensor. The output generated from the sensor is feed to Analog Input to Arduino board ( In my case Arduino Uno). The analog data is taken by ADC of Arduino, according to the voltage levels, it displays CO2 levels in ppm.
Specifications
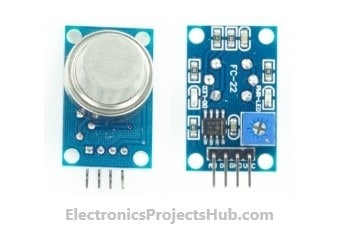

A0 – Analog Output of the Sensor
D0 – Digital Output of the Sensor
GND – Ground
VCC – 5V
You can use both A0 and D0, where A0 gives analog output by which we determine the value of CO2 in PPM. The D0 of the sensor gives output high when the CO2 reaches the high threshold.
Components Required
- Arduino Uno
- USB Cable A to B
- LCD Display Screen 16×2 I2C (Optional)
- Gas Sensor – MQ-135
- Bread Board
- Jumper Wires (Male to Male) – 3
- Jumper Wires Pack (Male to female) – 4
Connections
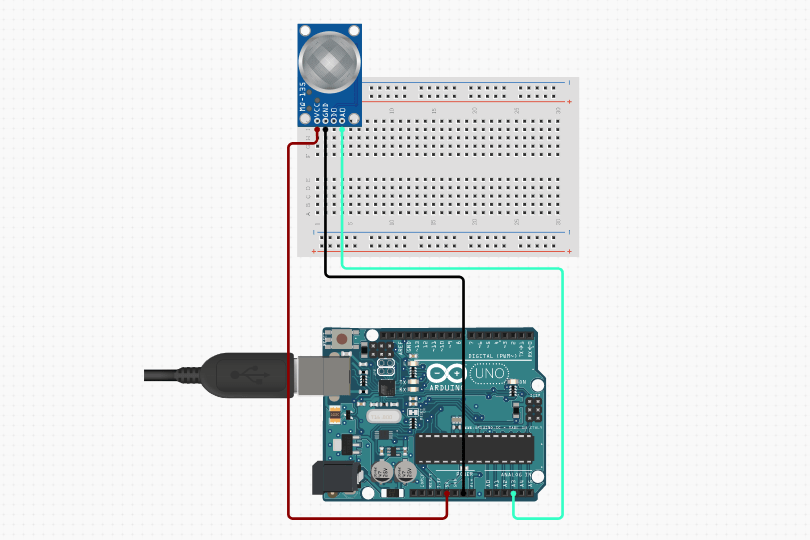
MQ-135 sensor with Arduino
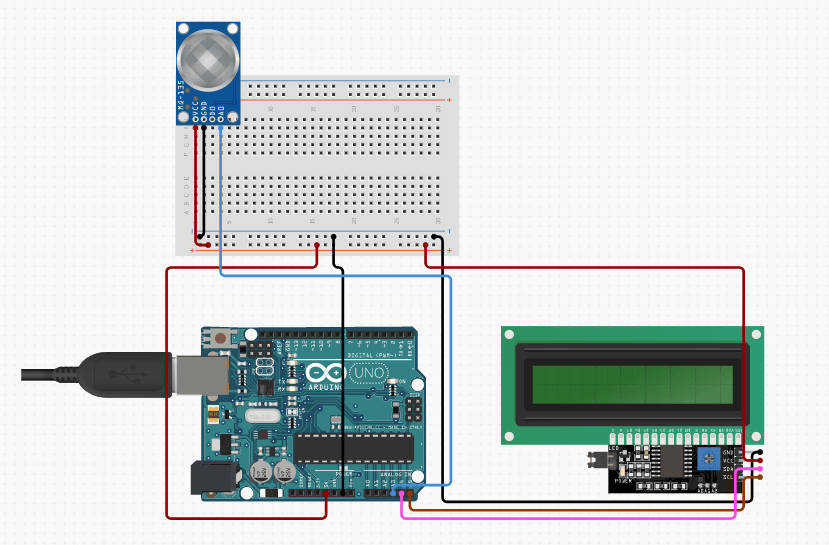
MQ-135 Gas sensor with LCD and Arduino
Download Libraries
/* Electronics Projects Hub - https://electronicsprojectshub.com */
/* Tech Maker YouTube Channel - https://www.youtube.com/c/TechMaker1 */
#include <LiquidCrystal_I2C.h>
#include "MQ135.h"
#define ANALOGPIN A2    //  Define Analog PIN on Arduino Board
#define RZERO 206.85    //  Define RZERO Calibration Value
MQ135 gasSensor = MQ135(ANALOGPIN);
LiquidCrystal_I2C lcd(0x27, 16,2);
void setup()
{
  lcd.init();
  lcd.begin(16,2);//Defining 16 columns and 2 rows of lcd display
  lcd.backlight();
  Serial.begin(9600);
  float rzero = gasSensor.getRZero();
  delay(3000);
  Serial.print("MQ135 RZERO Calibration Value : ");
  Serial.println(rzero);
}

void loop() {
  float ppm = gasSensor.getPPM();
  delay(1000);
  Serial.print("CO2 ppm value : ");
  Serial.println(ppm);
  lcd.setCursor(0,0);
  lcd.print("   Tech Maker   ");
  lcd.setCursor(0,1);
  lcd.print("CO2 : ");
  lcd.print(ppm);
  lcd.print("PPM");

}Related Project: How to make CO, LPG and Smoke Detector
If you have any queries feel free to connect us on social handles Facebook